The Trailforks Guide for Mountain Biking: how to make the most of the App and Website
- Guide mtb, Mtb life
- March 15, 2021
Here is the Trailforks guide for mountain biking: let’s discover how to make the most of this powerful tool, both from the App and Desktop. The special thing about Trailforks is that it shares MTB descents and the routes to reach the starting points. Often on the Trailforks map we only find the descents and maybe a climb segment that doesn’t match the start of all the trails. These and other things can be confusing for new users, but we’ll see how to use Trailforks to discover full routes and itineraries using Trail Logs.
In short, here’s what you can do with Trailforks:
- Discover all the descents in a region
- Find out how to reach the trailheads (climbs)
- Discover itineraries that include certain descents or climbs and use them for navigation
- Locate yourself directly on-site using Trailforks
- Add new trails
A typical use of Trailforks: identify the descents, find a route, go ride it
This is a classic use of Trailforks, so our guide starts here. I want to go ride in a specific area and plan an itinerary that includes the best descents.
1. Trailforks regions
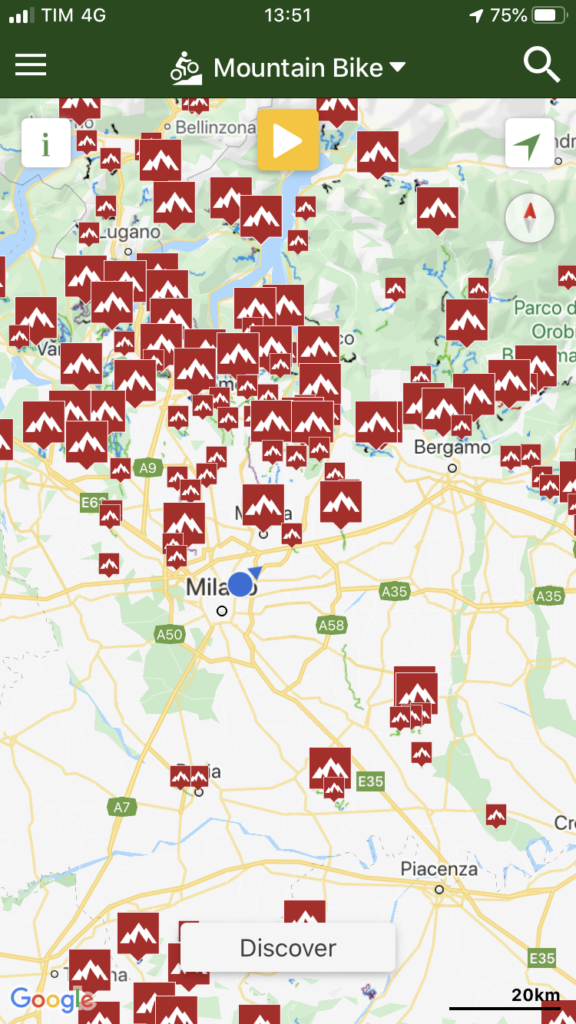
2. Trailforks trails
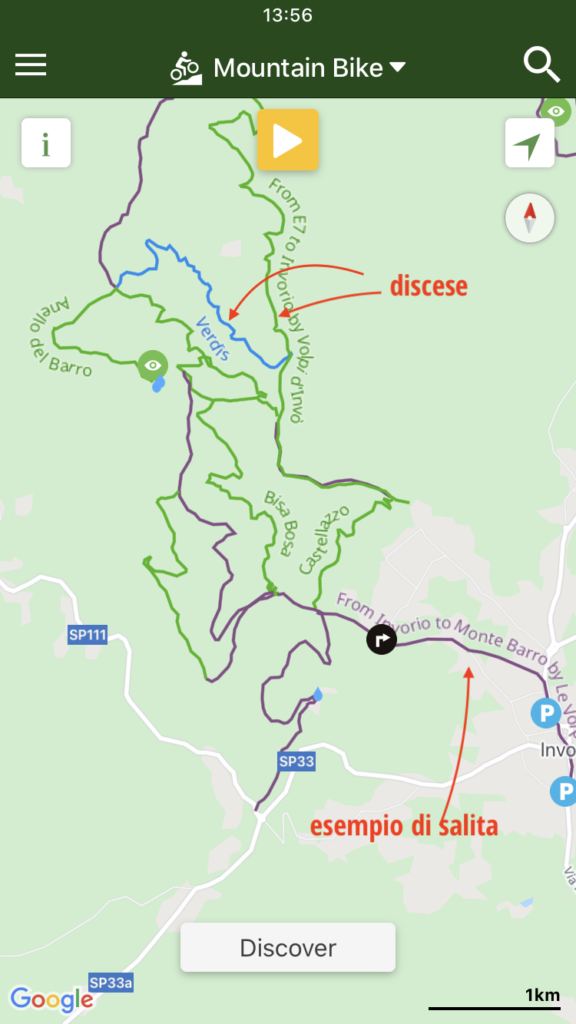
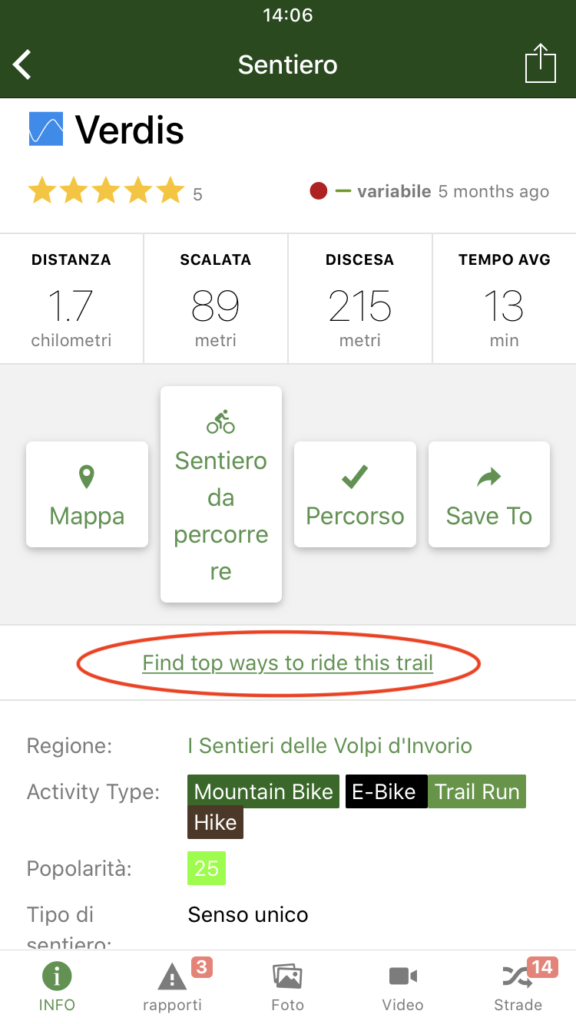
3. Trail detail
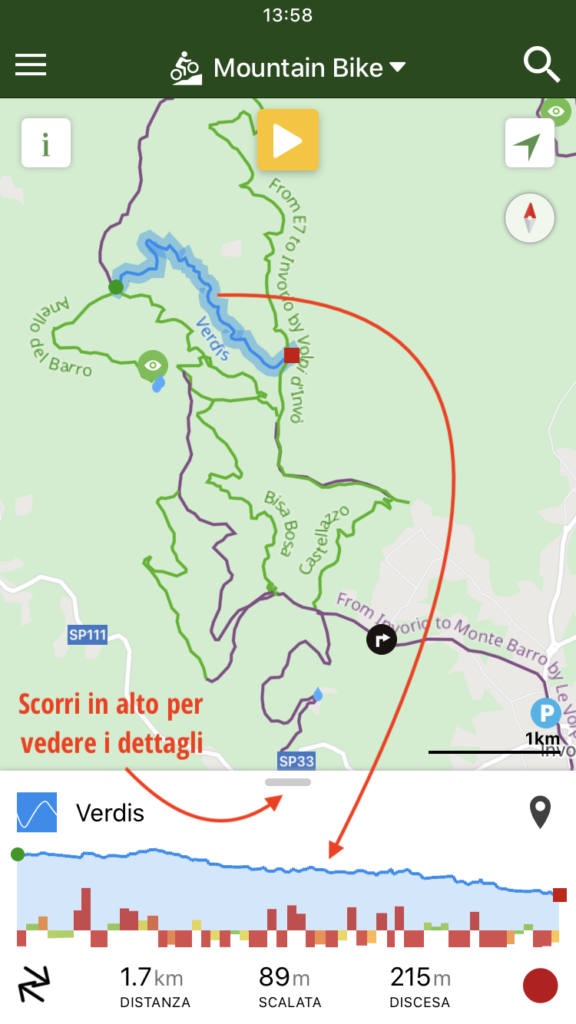
4. Find routes that include the trail
5. Trail log details
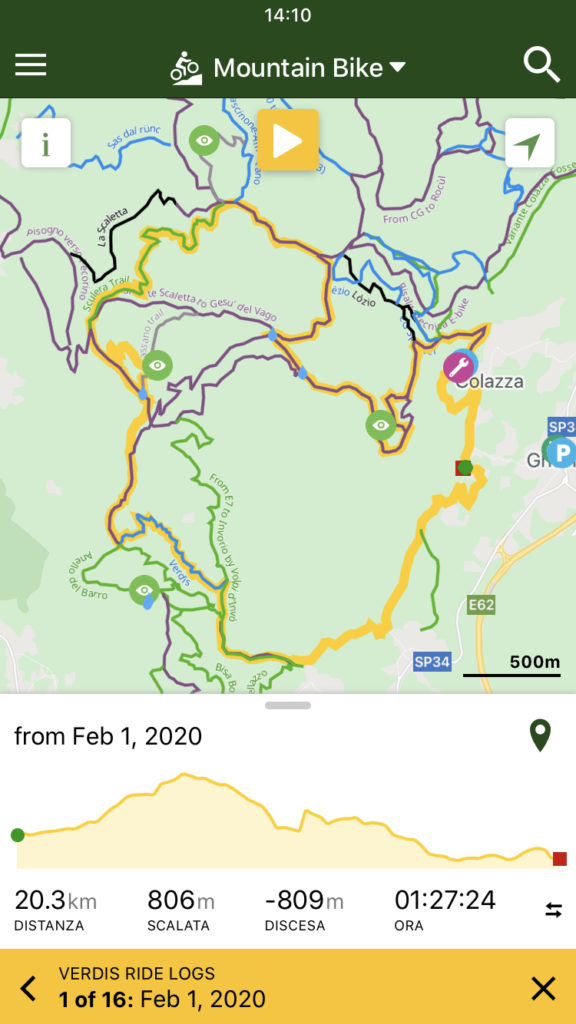
6. Use the trail log (route) for navigation
[Next] Use Trailforks routes on your GPS device
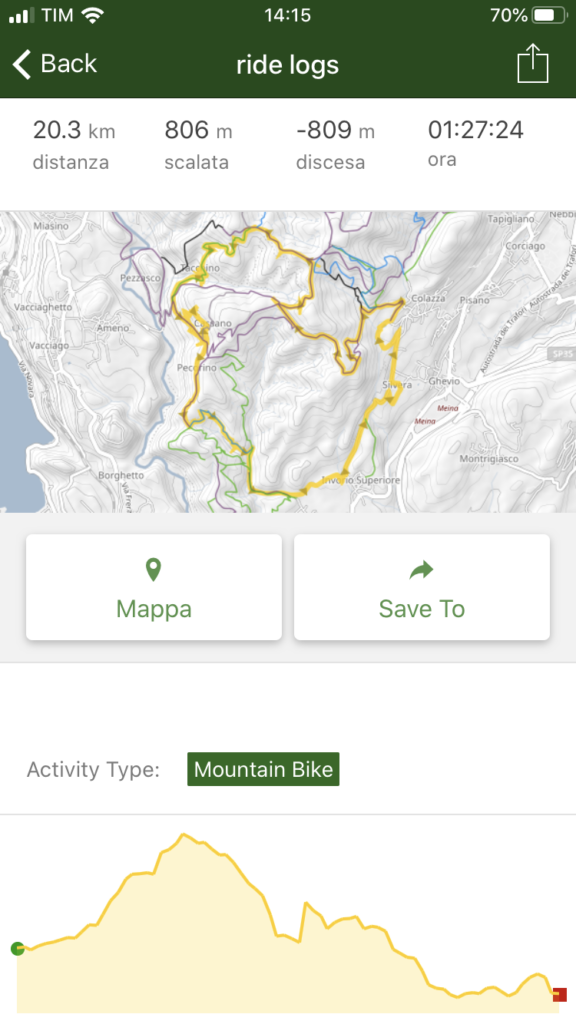
In the last image above [Screen6], you see the Trail Log summary—the actual route recorded by a biker that includes your inspected segment. Tap “Save To” and you’ll access a page where you can:
- Share the route with someone
- Add it to your wishlist
- Download the GPS track as a GPX file for your GPS
We’re mainly interested in points 2 and 3. Using “Add to wishlist” (2), the route will show directly on your Garmin Edge, the famous handlebar-mounted bike GPS.
Using point 3, you’ll get the raw GPX file, which you can load on your GPS the traditional way.
My typical Trailforks routine
When visiting a new area, this is what I usually do:
- Browse the map and select the longest descent with the features I like. (Or ask someone local for the “must-ride” trail.)
- Choose a Trail Log with suitable elevation and distance for me or my group.
- Tap “Save to” and use the track on the Garmin Edge.
- Once on-site, using Trailforks to see where I am, I may improvise changes if I spot another descent nearby.
Record your Ride Logs with Trailforks + Strava
I’ve connected Trailforks with Strava (see the Strava guide for MTB), so the rides I record with my Garmin Fenix or Garmin Edge go to Strava, then automatically to Trailforks, contributing to the Trail Logs. Setting up this connection is easier than it sounds—just explore the settings.
Alternatively, use the Trailforks app to record your ride: on the map page, tap the yellow arrow at the top center > Record Ride.
Add a trail to Trailforks
If you’re a local and want to add trails to Trailforks, you can. Use the Desktop version, log in, and go to TRAIL > ADD TRAIL.
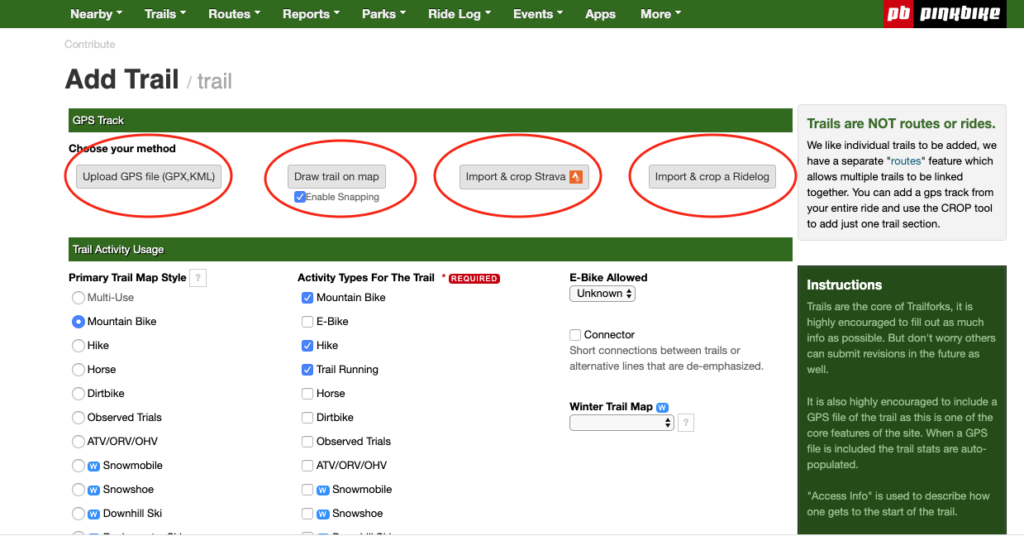
There are several ways to upload a trail: from a GPX file, drawing it on the map, importing it from Strava, or from a Ride Log.
Trails must be cropped—you can’t upload a full route. Trailforks expects a specific climb or descent. Cropping tools let you select just the section you need.